Is it possible to mix Static Cells and Dynamic Prototypes in two different sections of the same `UITableView`?
No, `UITableView` cannot concurrently hold Static Cells and Dynamic Prototypes.
Then can I have both static and dynamic content in the same `UITableView`?
Yes, since a Dynamic Prototype cell that is not configured at runtime is, in essence, a Static Cell.
Here is how.
Step 1: Skip directly to Step 2!
 Unless you already have created Static Cells or are experimenting with static content, prefer creating Dynamic Prototypes as detailed in step 2.
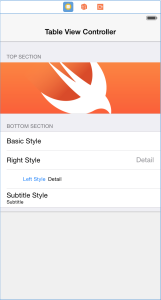
For good humor, here is how you might have created Static Cells: Using the Attributes Inspector in Interface Builder, set your table view’s content to Static Cells, add sections, pick a style, and add as many instances of `UITableViewCell` as deemed necessary. Using a combination of standard and custom cell styles, and with just the right amount of Autolayout constraints, this is what your interface could look like.
Note that this example contains exactly 0 lines of code. If you do the math, you will conclude that this application also contains 0 bugs.
Step 2: Adopt the UITableViewDataSource Protocol
 At this point, the industry standard is to subclass `UITableViewController`. This is a simple task, since adding such a subclass in Xcode will provide you with some blank methods. You must, of course, set the Custom Class of the `UITableViewController` to your own Class, if you decide to go that route.
If you already have Static Cells in a static table view content, you can migrate them into a Dynamic Prototypes table view using drag & drop. Attempting to switch Table View Content style of table already containing cells may lead Xcode to uncharted territories.
Mimic the sections and rows programmatically:
override func numberOfSectionsInTableView(tableView: UITableView) -> Int {
    return 2
}

override func tableView(tableView: UITableView, numberOfRowsInSection section: Int) -> Int {
    switch section {
    case 0:
        return 1
    case 1:
        return 4
    default:
        assert(false, "section \(section)")
        return 0
    }
}
By picking Table View Cell Identifiers in the form (x,y), and setting a unique identifier to each Table View Cell, the `cellForRowAtIndexPath` method becomes incredibly short. It is, literally, a single line of code.
override func tableView(tableView: UITableView, cellForRowAtIndexPath indexPath: NSIndexPath) -> UITableViewCell {
    return tableView.dequeueReusableCellWithIdentifier("\(indexPath.section),\(indexPath.row)", forIndexPath: indexPath)
        as! UITableViewCell
}
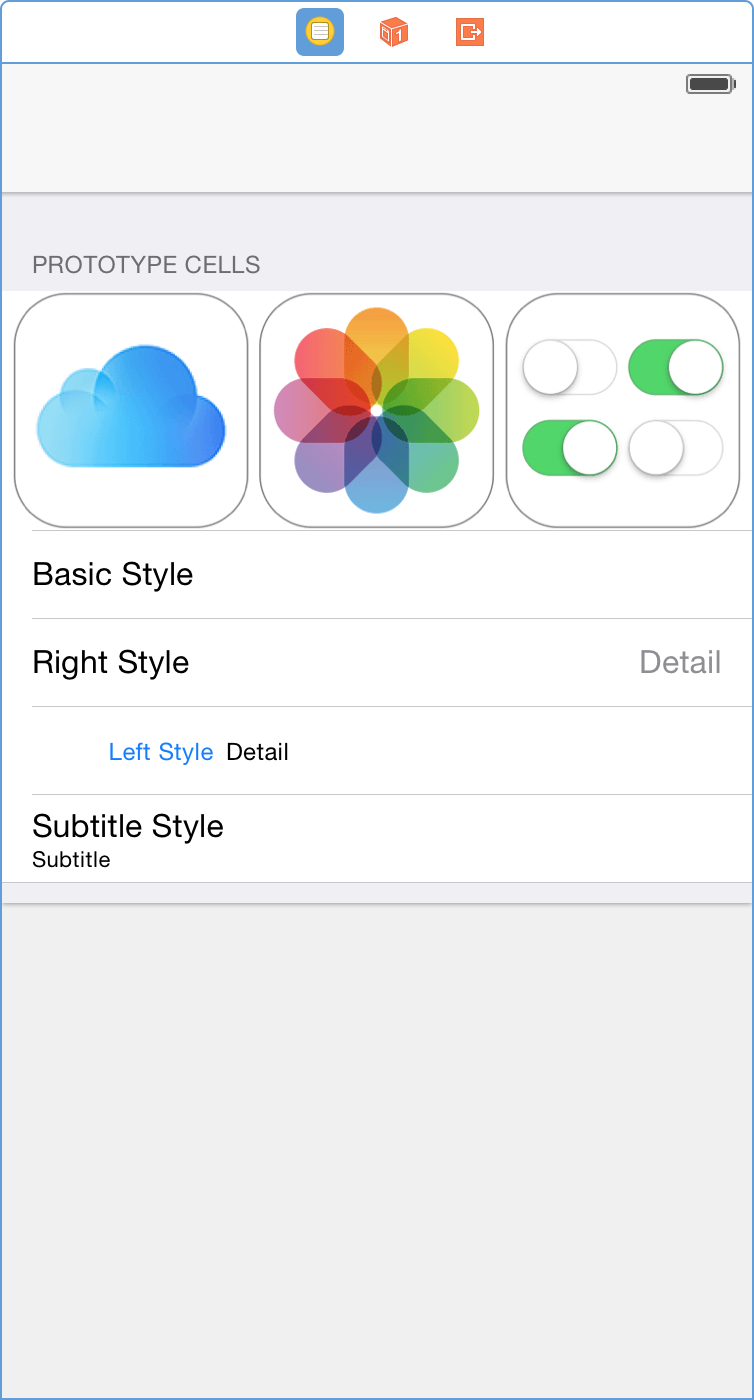
Step 3: Add custom Dynamic Prototype Cells
- Select your Table View in IB > Show Attributes Inspector > Table View > Content > Dynamic Prototypes
- From the section IB > Show the Object Library, drag as many Table View Cell onto your table view as you have cell types.
- If you have some cells that never change at run time, you can very well create 1 instance of each right there in IB ; they will behave like `Static Cells`
- (*) For the custom cells, the recommended practice is to create subclasses of `UITableViewCell`, and apply that custom class to the relevant cell or cells (IB > Show the Identity Inspector), and pick your Custom Class from the list. This of course implies you have created such sub-classes.
- Do not forget to assign a unique identifier to each cell prototype, so that you can retrieve these at runtime using `dequeueReusableCellUsingIdentifier`.
With this setup, you can select your Table View Cell, IB > Show Assistant Editor, and control-drag references in your custom class. You may need to tell the Assistant Editor which file to pick.
(*) There are plenty of other ways to do this ; all outside of the scope of this article.
Read more on SwiftArchitect Post 31757433 on StackOverflow.